Morning folks! Sharing with you all today is a layout i made especially for my sweetest friend Nancy over at
The Nickel Nook. Warning! This is another picture heavy post :) so please be patient to scroll down to see all the photos. This is a family themed layout. Enjoy!
This is a beautiful quotation i have to put on the layout. I used my label maker and each word is backed with a cardstock to add depth then i used my scissors to distress the edges.
And here's the full layout without the acrylic cover on it. It's a perfect family photo! I just love how everyone smiles :) a sweet moment to cherish.
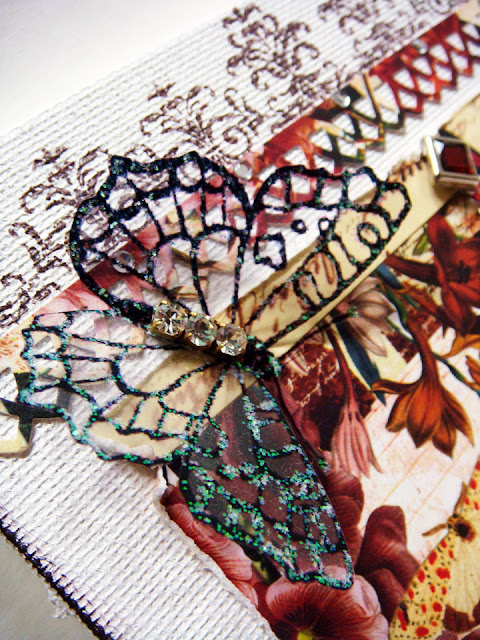
i printed out this butterfly from my computer and embellished it with rhinestones from a broken jewelry. I also outlined the patterns of the butterfly with crystal stickles.
I hand sew the ribbon flower behind the yellow fabric flower. The dotted lines you see on the petals of the flowers were created using a Touch Marker pen. As to the bird, i used Ifoam just like the one i used on my previous mini album.
I used the chandelier stamp from the Cantaria stamp set by Prima, embossed it with silver embossing powder and attached those jewelry chain to look more interesting :) A gem brad was tacked in place to hold the hanging chandelier which is also supported with foam tape on its back. I really made sure it won't fall lol!
One thing i love to do in my project is creating a dimension...i just love using Tulip Puffy fabric paint! You can see the proof on this photo lol! I heat dry the paint until it rises and voila! a puffy dimensional circle! :) I then color it with Copic Markers.
The white stuff on the doily is just a paint that has a sand texture to it...love using this too!
I traced the butterfly on the paper with a clear sheet and then cut it out and adhered it on top of it, i outlined the edges including the antennae with crystal stickles, added 2 rhinestones on its back.
Here's a close up photo of what i did on the canvas, the stamped border is by Prima and the punched out border was created using Martha Stewart border punch and accented it with rhinestones. I also hand sew some parts of the paper to give more touch to the layout.
This is how it looks like with the acrylic cover on.
That's all folks! If you have any questions about this project, please feel free to ask me :)
Thanks for stopping by...take care!


3 comments :
Hi Joy,
Nancy suggested stopping by your blog and wow....the layout you created for his is amazing. Truly a work of art. And from her post, she is quite thrilled with the gift. Super sweet of you!
:O)
Jessica
Your photos are really great Joy! I'm going to send my daughters over to take a look at it. They won't be home to see the real thing for a little while! It's so gorgeous and I love it! Thank you, my dear friend! :o)
wow, i am speechless. I came here, by following Nancy's link.
Your work is just adorable!! Can not trust my eyes, when i saw all this cuties. wow!!!
All the best for you
Dunja from Germany
P.S. I am a follower of your blog, now :)
Post a Comment